How to paint this · Acrylic
A little lighthouse, a lovely afternoon
Paint a bright coastal scene, from the first blue layer to the last little wave.
Allow 2–3 hours, plus drying. Go at your own pace.
Let’s paint →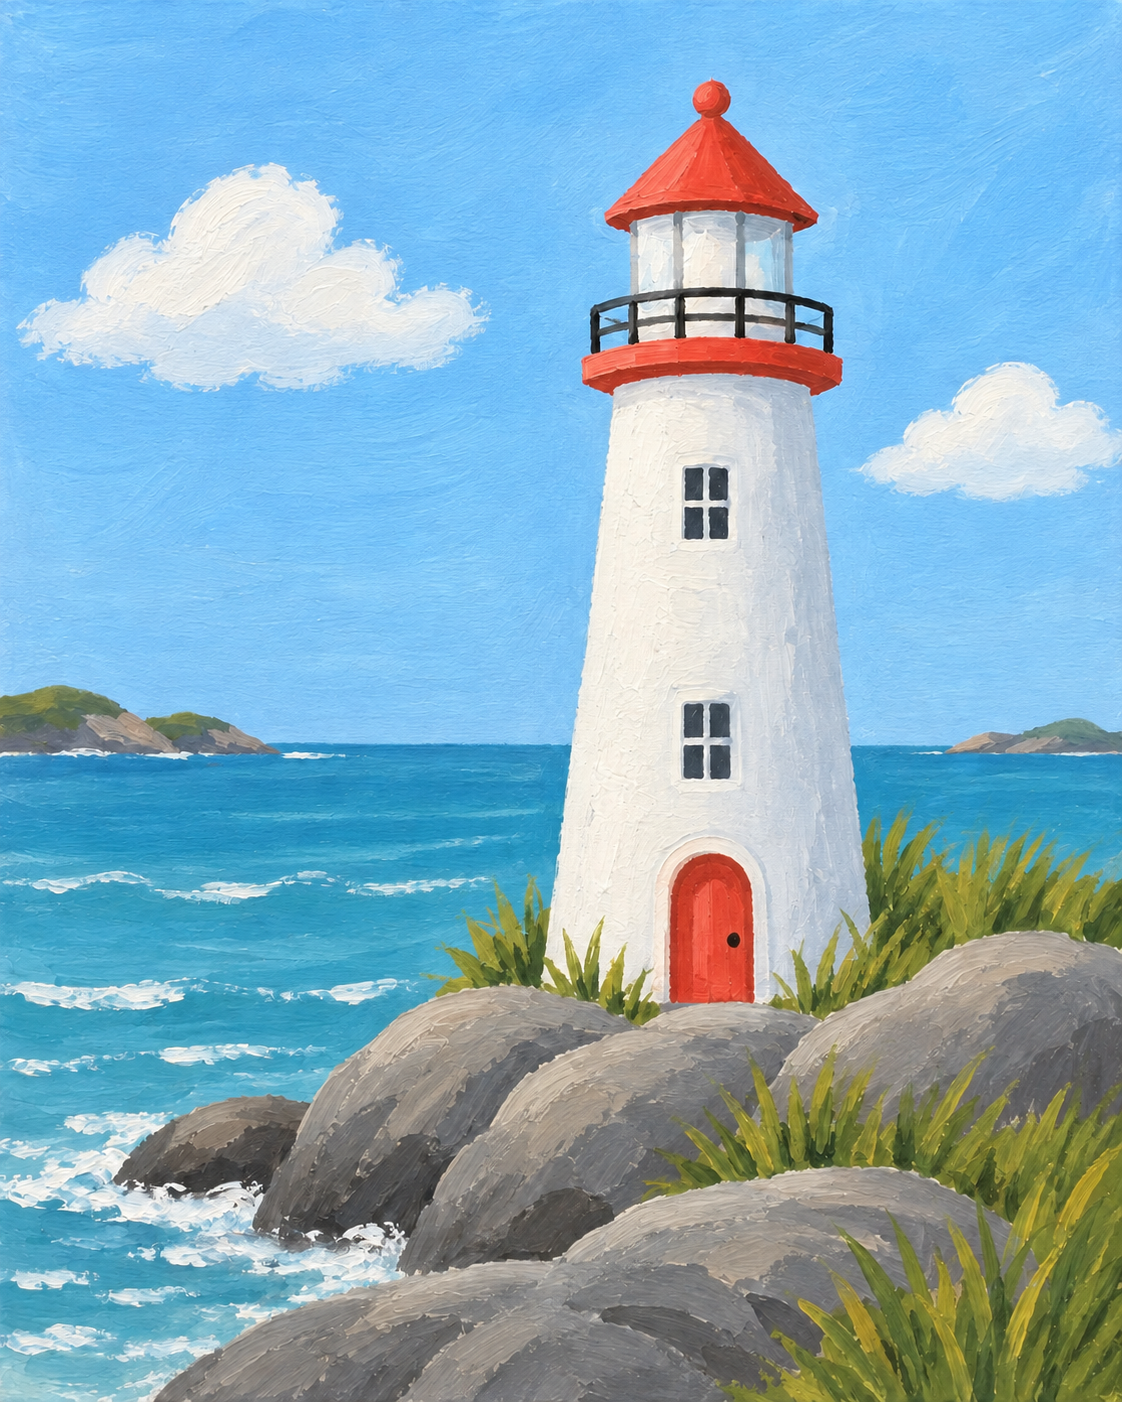
That lighthouse looks detailed, but the painting begins with just two areas: sky and sea. We will work from the distant background toward the foreground. Keep the windows and grasses for the end. They look much easier once the big shapes are in place.
Before the first brushstroke
Gather a few things
- An 8 × 10 inch primed canvas, portrait orientation
- A 1-inch flat brush, a medium flat brush, and a small round brush
- Acrylic paints: titanium white, blue, yellow ochre, red, and burnt umber
- A pencil, palette, water cup, and cloth
Use a protected work surface. These steps are for acrylic on a primed canvas, not watercolor.
Your starting palette
Mix small amounts first. Pigments vary, so these are starting mixes, not exact color matches.
- Sky blue
Start with white. Add blue a little at a time.
- Sea turquoise
Blue + white, then a tiny touch of yellow ochre.
- Warm stone
White + burnt umber, cooled with a little blue.
- Coral red
Red + white, warmed with a little yellow ochre.
- Grass green
Yellow ochre + blue. Add white for lighter blades.
Stage 1 of 4
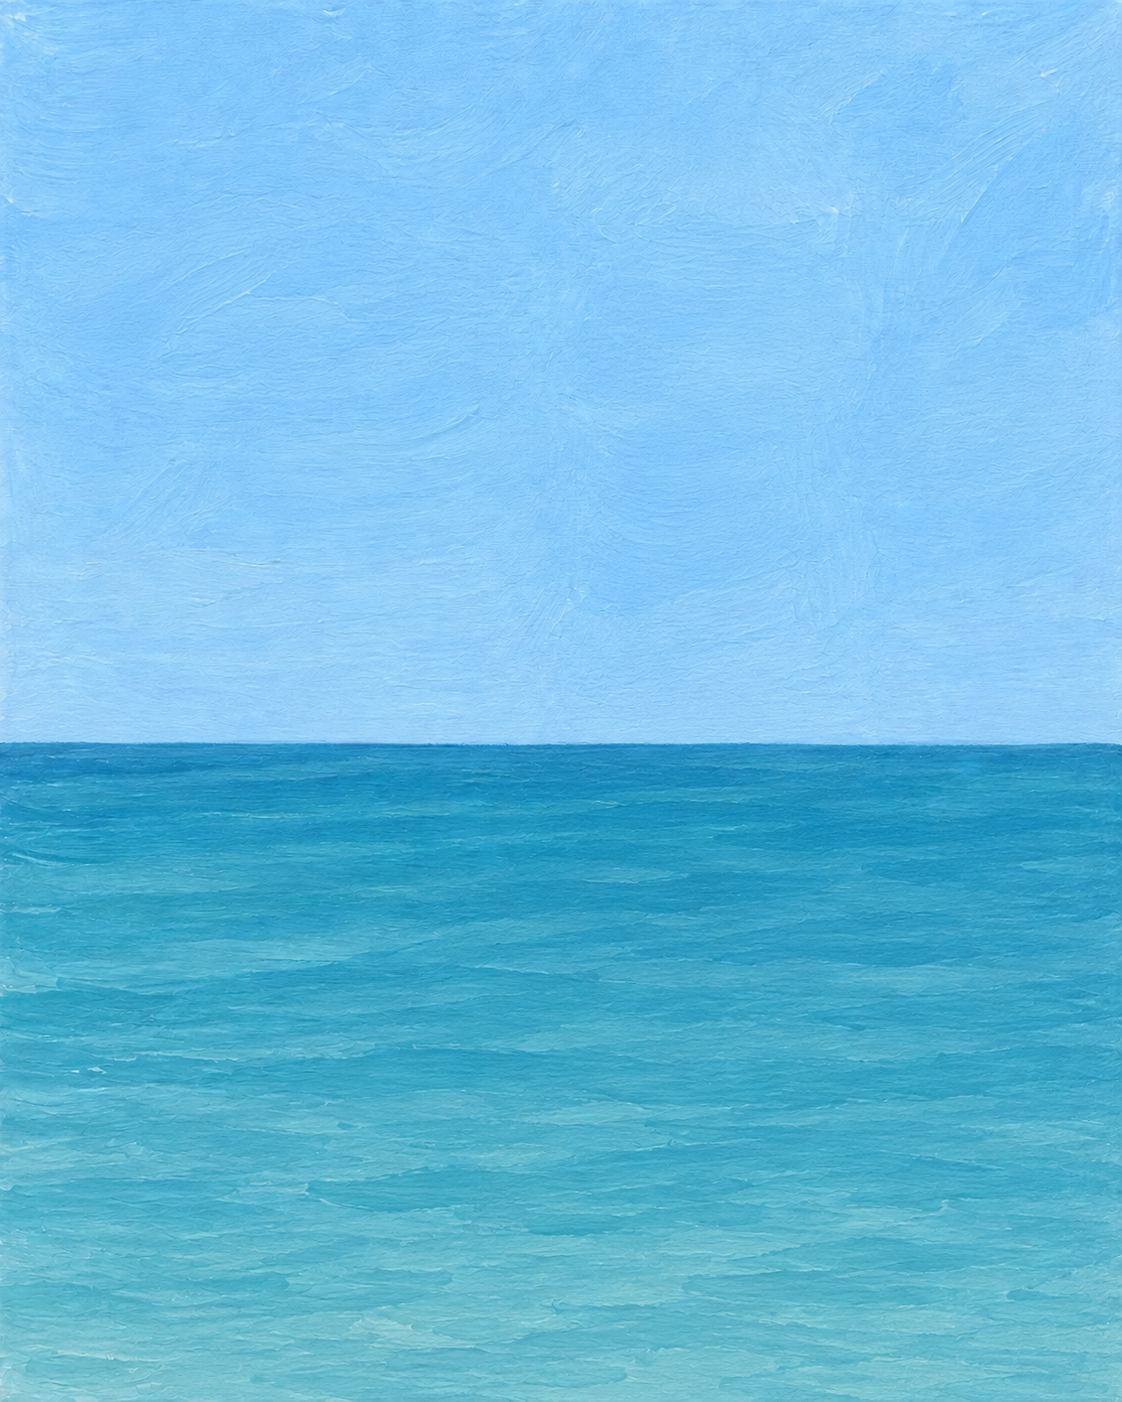
Begin with sky and sea
- Lightly mark the horizon just below the middle of the canvas.
- Cover the sky with pale blue using the wide flat brush.
- Paint turquoise below the horizon with horizontal strokes.
- Blend a little extra white into the sea near the bottom.
Before you move on: Let the background dry to the touch before you add the next shapes.
Stage 2 of 4
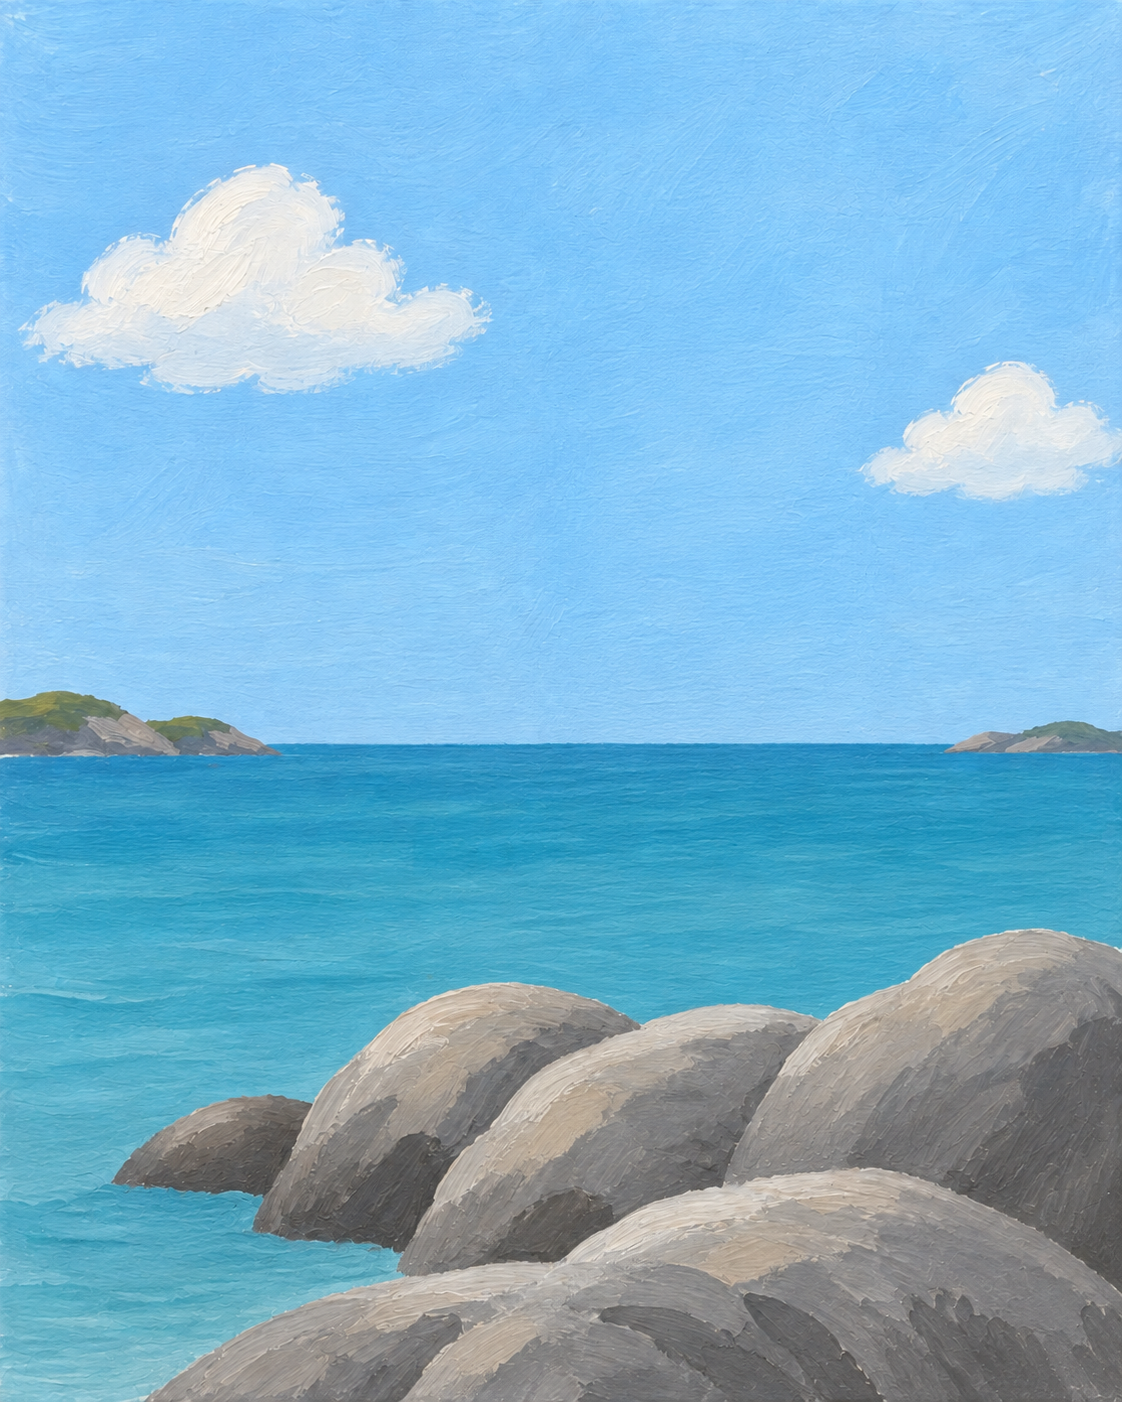
Place the clouds and rocks
- Dab two loose cloud shapes into the dry sky with warm white.
- Add small, muted islands at the far edges of the horizon.
- Block in large gray rocks across the lower third.
- Add darker gray beneath the rocks and lighter gray along their top edges.
Before you move on: Keep the center-right area open for the lighthouse. Let the rocks dry.
Stage 3 of 4
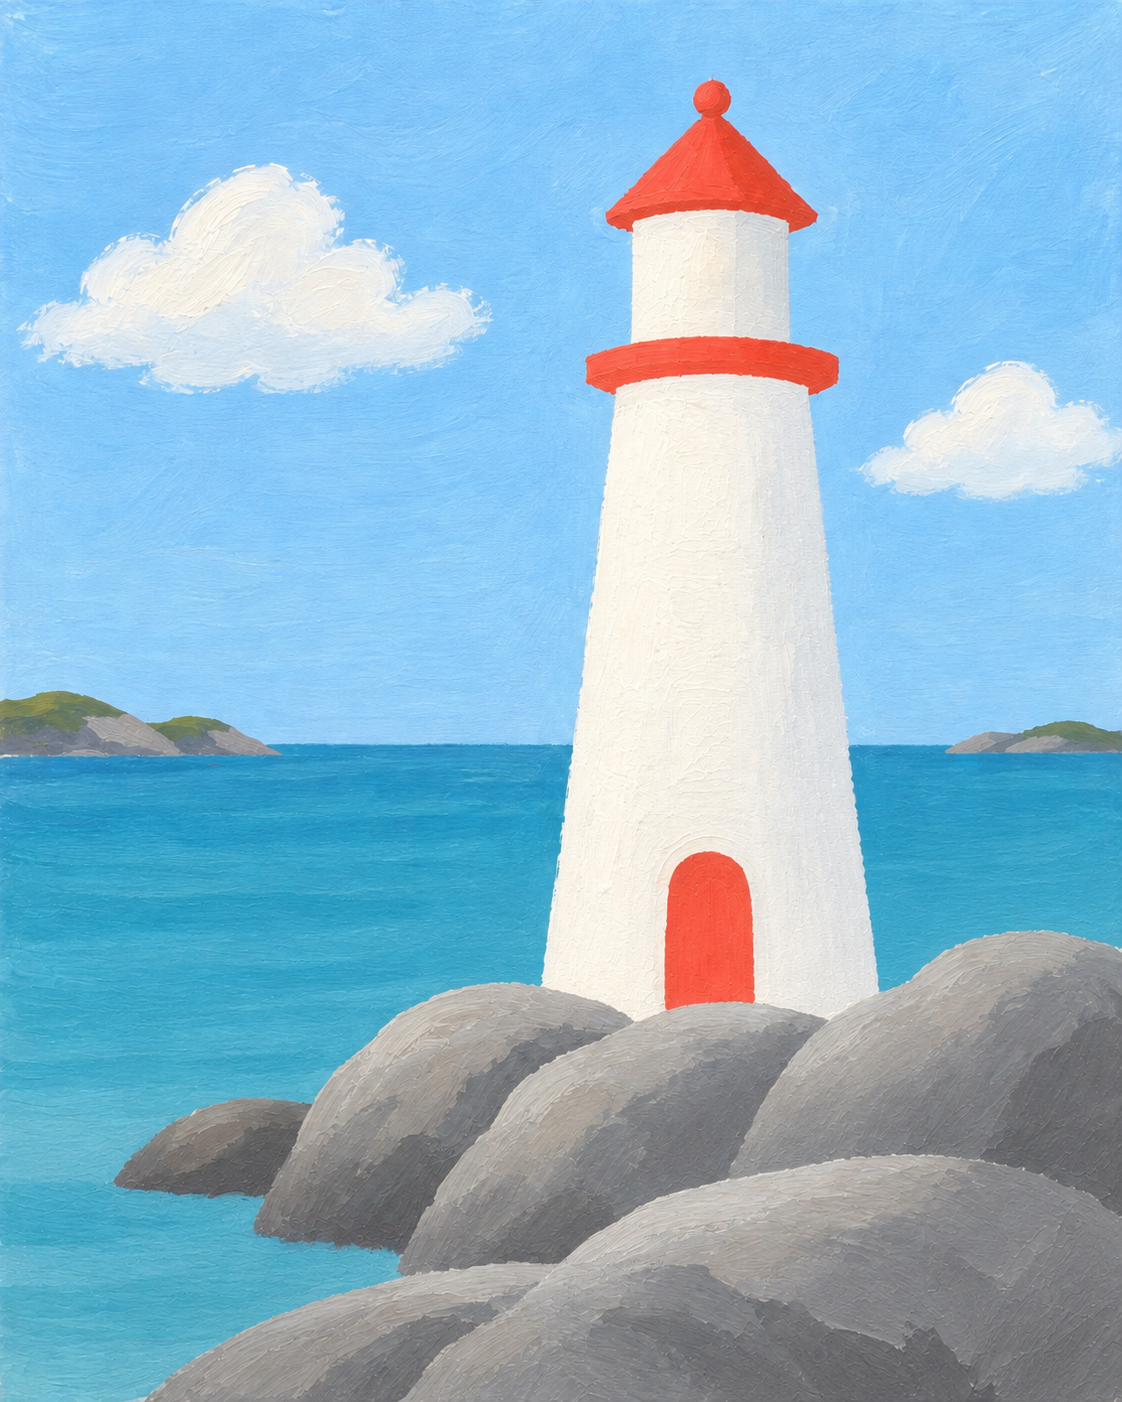
Build the lighthouse from simple shapes
- Draw a tall tower, slightly wider at the bottom, above the center-right rocks.
- Fill the tower with warm white. Use a second thin coat after the first dries.
- Paint the triangular roof, balcony band, and rounded door in coral.
- Add pale blue-gray along the right side of the tower for a soft shadow.
Before you move on: Let the white and coral dry before you add windows or railings.
Stage 4 of 4
Finish with a few small marks
- Add small dark windows and thin balcony rails with the round brush.
- Pull green grass strokes upward from the cracks between the rocks.
- Touch lighter green onto a few grass tips.
- Add short, broken white marks to the water. Leave blue between them.
Before you move on: Step back. Keep the sky open and stop before every wave has a white outline.
A small fix, not a fresh start
If something looks a little off
The lighthouse looks streaky.
Let it dry. Add another thin coat of warm white instead of pushing wet paint back and forth.
My waves look like stripes.
Let them dry. Break up a few white lines with the sea color, then add shorter, uneven marks.
Make it yours
A different color. Your own little twist.
Try a mustard-yellow door or a softer peach roof. Keep the shapes and painting order the same.
Create my own painting →Opens the invite-only art room. Choose your idea there; this sample does not start a paid request.